How long does chocolate harden at room temperature? All the secrets of tempering chocolate
Beautiful decorative chocolate figures, chocolate bars and even lace - all this can be created by a confectioner who knows the tempering technique. It will provide the chocolate mass with an elastic texture, and will give the finished product hardness, gloss and resistance to heat.
What is the tempering process?
What is this tempering process? It is responsible for several indicators at once, for example:
From a technological point of view, tempering is the process of heating chocolate and then cooling it, during which the crystal lattice of cocoa butter molecules changes: they come to a stable state in which chocolate acquires all the characteristics described above.
In practice, tempering cocoa butter can be carried out in several different ways: just follow the procedure exactly, prepare the necessary confectionery equipment, and most importantly, stock up on a good cooking thermometer.
Important information about the ideal tempering temperature
Every detail is important in this matter, especially when it comes to temperatures. In particular, they play a role:
- The temperature in the room where you will work should be within 18-22 degrees, not higher.
- The granite/marble slab or dish in which the chocolate will cool should be the same 18-22 degrees.
- If you use chocolate tempering when making sweets, make sure that the filling is about 5 degrees cooler than the mass, otherwise the products will melt.
The tempering temperature of chocolate also depends on the fluidity index, as well as on the temperature at which the chocolate is cooled after tempering.
If there is no index marking on the raw materials, you can use the following standard table-scheme for varieties of chocolate:
|
Type of chocolate |
heating t |
t cooling |
t reheat |
|
Dark |
|||
|
Lactic |
|||
|
White |
More about the ideal tempering temperature: it is this ratio that will allow you to comfortably continue processing in the future, for example, transfer the mass into containers for molding or cast patterns.
Chocolate tempering equipment
Depending on what method you will use when tempering, you will need the following equipment for tempering chocolate:
- Granite board or marble - for cooling.
- Infrared thermometer.
- Microwave or oven.
- Bathtub made of food-grade plastic.
- Spatulas for mixing.
- Special automatic tempering machine.
If you want to try this technology at home, equipment for tempering chocolate at home can be quite accessible to everyone: an oven or microwave, bowls, a spatula, a regular immersion blender and a hair dryer will cope with the task.
What about the ingredients? Of course, you can achieve the right consistency by simply melting and cooling the chocolate itself. Another way is to use special ingredients:
- Callets - already tempered shock granules.
- Fine cocoa butter.
- Chocolate drops.
All of them help to change the structure faster than with conventional heat treatment.
How to temper chocolate at home: techniques
There are many ways to temper chocolate. We will present the most effective and easiest of them, which will answer the question of how to make tempered chocolate at home.
Tempering on a stone surface

To carry it out, you need a marble board or a surface made of another stone . Melt the chocolate to about 50 degrees.
If you plan to temper a little, pour the entire melted mass onto the stone and stir with a spatula until it cools to +27.
If there is a lot of chocolate, put ⅔ of it, and after cooling, return the remaining 1/3 to the bowl. Stir thoroughly again to raise the temperature to 31 degrees. For this purpose, it is worth using a blender - this will also get rid of air bubbles from the chocolate.
Automatic tempering
If you have a chocolate pourer, it makes an excellent tempering tool, as many models have chocolate warming and kneading functions. A specialized tempering machine is similarly good.
D To carry out the manipulation, put chocolate in its bowl, set the thermostat to 45 degrees, and then reduce the temperature to 32. Immediately after reducing the heat, add Callebaut granules there in a proportion of 1/5 of the total volume. When the callets are completely dissolved, you can continue working with the chocolate. This technique can safely be called the most accurate way of tempering chocolate, because it is controlled by a device, not a person, and even with it you can do without a thermometer and without a board.
Recipe from Andy Chef
But one of the most popular online culinary authors, Andy Chef, covers his tempering of chocolate at home on his blog: heat the chocolate to 40-45 degrees, and then cool to 33-34. Stir in capsules Mycryo (fine cocoa butter). Take them only 1% of the total amount of chocolate. And stir until dissolved. So, by the way, you can temper cocoa butter for sweets.
When choosing how to temper chocolate at home, start from the technique that will be convenient for you personally.
Common mistakes when tempering chocolate
Even a seasoned pro is not immune from mistakes. And typical mistakes when tempering chocolate are:
- Overheating, which causes the chocolate particles to begin to curl, losing texture and gloss.
- Underheating and incomplete dissolution of pieces.
- Cooling at too fast a pace or at low temperatures leads to matting and the appearance of a coating on the chocolate.
- Use of unsuitable raw materials.
- Improper storage is one of the most common mistakes when tempering chocolate. Because of this, fat or sugar bloom occurs, the chocolate will crack, become covered with condensation or become soft.
 Tempering chocolate: tips from VTK
But to avoid mistakes in tempering chocolate, advice from VTK will come in handy!
If the chocolate thickens too quickly when it cools, add a little hotter product, stir and heat slightly in the microwave.
It is very simple to check whether we have the desired consistency if we temper chocolate at home: dip the tip of a knife into it: a well-tempered chocolate mass will harden within three minutes and will shine impressively.
If you immediately plan to pour into containers for shaping, do not forget to knock them well on the table after filling - this will release any excess air bubbles.
Choose only proven brands of confectionery chocolate - with them you are more likely to get a good result the first time.
By the way, you will find excellent options for chocolate, tempering tools and consumables in our online store, and Muscovites can look into our showroom on the street. Sheremetyevskaya, 85, st. 1 Here you will find low prices and very pleasant service with a wide range.
I want to make a big article for you about chocolate. As a Cacao Barry Ambassador, I want to share with you the knowledge that we have in our history. And I’m glad that such an opportunity exists. I want you to stop being afraid of the word “tempering” and respect a product that is very difficult to produce and which, at times, is worth its weight in gold. In the literal sense of the word.

Where does it all begin? From cocoa bean. Or more precisely the tree on which it grows.
- Cultivation: Growing cocoa requires certain climatic conditions: high humidity, high temperature and a dry period of no more than 3 months a year. These conditions exist on the globe between the Tropic of Cancer and the Tropic of Capricorn. Cocoa trees begin to bear fruit in the fifth year.
- Harvesting: The cocoa tree is a member of the cauliflora family, the flowers appear on the tree trunk and develop from dormant buds. Of all the flowers produced, less than 10% are naturally pollinated and even fewer reach the cocoa fruit stage. It takes 4-6 months for the fruits to ripen. Each cocoa fruit contains 30-40 grains, protected by a sweet-sour shell. Ripe fruits vary in color and are collected from the trees by hand.
- Opening of cocoa fruits: After picking from the trees, the fruits are stored for no more than 2-5 days, as they will then be unsuitable for fermentation. The cocoa fruits are carefully opened using a non-sharp tool. Opening must be done so as not to damage the beans.
- Fermentation: After opening the fruit, the beans with pulp are separated from the peel by hand and prepared for the next stage - fermentation. Traditionally, the pulped beans are piled up, covered with banana tree leaves, and left to ferment naturally. Since the beans are in the pulp of the fruit, fermentation begins. During this process, the sprouts of each cocoa bean die and the aromas emerge. Fermentation lasts from 5 to 7 days.
- Drying cocoa beans: Optimal aroma develops when the beans are dried in the sun. The beans can be dried spread out on cloth on the ground or in heated greenhouses. The ideal drying conditions are in a place protected by a roof, which allows the beans to dry even in bad weather. Dry beans for best subsequent storage should not contain more than 6 - 8% moisture.
- Quality control of cocoa beans: At the collection centers, the beans collected from farmers are monitored through random tests, then sorted, weighed, packed in jute bags and sent to storage warehouses.

- Cleaning of beans: After arrival in France, the origin of the raw material is checked and additional tests are carried out to confirm its quality. Then the beans are cleaned of the shell and other associated contaminants. Cacao Barry® guarantees that its products contain 98.25% shelled beans, leaving no hulls, minimizing loss of flavor.
- Roasting: The cleaned beans are roasted to the specifications of each Cacao Barry® chocolate. Roasting avoids the development of mold and fungi in the beans, and also affects the organoleptic qualities obtained during the fermentation and drying stages. To achieve the best possible flavors, the company constantly seeks the perfect balance between the temperature used and the roasting time. To preserve the natural and purest aroma of cocoa, the company minimizes the roasting time for some of its chocolates.
- Grinding Nibs: To obtain cocoa mass, cocoa nibs are ground to a size of 12-15 microns, which releases a rich aroma that is easily recognizable when tasting. Grinding occurs in three stages, resulting in a very smooth paste. This paste is called cocoa mass. The quality of this cocoa mass is checked through testing by many experts and only then used in the manufacture of chocolate.
- Mass pressing: We obtain cocoa butter by pressing, separating the by-product solids. The cocoa cake remaining after pressing may vary in the percentage of fatty substances, depending on how it is going to be used further. This cake is the raw material for making cocoa powder by spraying.
- Mixing ingredients: Once the cocoa mass has been tested and approved by specially trained tasters, the chocolate making process begins. The first step consists of adding the correct ingredients to the mixer: cocoa mass and sugar (and milk, to make milk chocolate). The ingredients are thoroughly mixed to obtain the correct texture for subsequent processing.
- Grinding cocoa cake: To obtain a quality product, grinding occurs in two stages. Pre-grinding is carried out using two cylinders, and then done on a machine with four cylinders. The size of the particles obtained during grinding then affects the properties of the final chocolate product, such as melting and aftertaste in the mouth.
- Conching: Depending on the purpose of the intermediate product, the chocolate mass mixed and processed in the mixer can be conched. This process consists of heating the chocolate mass to a certain temperature with constant stirring, which reduces the percentage of moisture in the mass and reduces acidity. After several hours of conching, cocoa butter can be added to obtain the product with the required fluidity.
- Molding: After tempering, the chocolate is molded into blocks or PistolesTM, which is the optimal format for pastry chefs creating their own recipes.
- Quality control during the production process. At all stages of production, cocoa product particle size, fat percentage and fluidity are regularly measured and controlled to ensure the highest quality final product.
This is how long the cocoa bean goes to become excellent quality chocolate.

Tempering chocolate:
The purpose of tempering chocolate is to crystallize the cocoa butter in the chocolate, which is related to the operating temperature of the chocolate. During the tempering process, the cocoa butter in chocolate becomes stable. This gives the chocolate its hardness, brittleness and shine after cooling. If chocolate is melted at 40 to 45°C and then cooled, the finished product will not be glossy or hard. We need to reassemble the crystal lattice that was destroyed during the heating process.
Important: it is impossible to buy ready-made tempered chocolate. Any chocolate that you buy in a store is already tempered a priori! Otherwise, it simply won’t look the way it is in the packaging or gallets. And as soon as you melt it, it ceases to be tempered, everything must be started again.

Types and variations of tempering:
The first thing I want to say is that all methods work. You choose the one that is more convenient and convenient for you.
We will omit such a method as tempering using a special machine. Everything is simple and clear there.
- Using a marble slab.
Ideally, a natural stone is marble or granite, which holds the cold and does not absorb the heat of your chocolate so quickly. On other surfaces, you will simply get them dirty (meaning stainless steel tables, only if there is no refrigerator under them).

Melt the chocolate in the microwave or in a double boiler and bring to the temperature scale that matches your chocolate (dark, milk or white).
Pour 2/3 of the mixture onto a cold marble surface. And knead the chocolate using a spatula and scraper. Continue stirring until the chocolate thickens and reaches the desired temperature, depending on your type of chocolate. The thickening process means that the temperature has dropped and crystallization has begun.
Pour the cooled chocolate into the container with the remaining 1/3 of the chocolate and mix well. This 1/3 of warm chocolate will immediately raise the temperature level to working temperature.
The chocolate is ready to go. If the chocolate thickens during operation, warm it slightly to operating temperature in a hot bath or in the microwave. Always test by dipping the tip of a knife or piece of parchment into the chocolate, if the chocolate is properly tempered it will set in 3 minutes at around 20°C indoors.
- Crystallization using "Callet".
Crystallization can be done very simply by adding previously crystallized chocolate to melted chocolate. To do this, you can use chocolate in the form of callets. (this means the professional form of “drops” or “buttons” or they are also called “galettes” in packs of chocolate). The callets have previously been tempered and contain cocoa butter in crystalline form. The required number of callets depends on the temperature of the melted chocolate and the callets themselves. When the melted chocolate has a temperature of about 40°C, you need to add 15-20% of the callets, which have a temperature of 15-20°C. 20C- this is the temperature of already crystallized chocolate!
Melt the chocolate in the microwave or in a water bath and bring to the temperature scale that corresponds to your chocolate (dark, milk or white) and immediately add from 15 to 20% of the callets at a temperature of 20°C. Mix the chocolate well until the Callets are dissolved. If the Callets dissolved too quickly, the chocolate was too warm. Add more Kallet and continue stirring. With this method you will quickly get chocolate ready to use.
- Tempering in a microwave oven.
This method is well suited for tempering chocolate in callets. Place some Callettes in a plastic bowl. Set the maximum microwave power to 800-1000 W. Place the bowl in the microwave and start melting your chocolate. Every 10-15 seconds, remove the bowl and stir. Do not allow overheating above 34C for dark and 30-31 for milk and white chocolate! Use accurate thermometers (pyrometers or as they are also called “laser thermometers”). Chocolate does not tolerate an error of several degrees.
- How to check crystallization:
To check the result of tempering, apply a little chocolate to the tip of a knife or a strip of parchment. If the chocolate is well tempered, it will become hard within 3 minutes at an air temperature of 18-20°C and will have a good shine. If this does not happen, continue tempering. Important: the room temperature should be comfortable for chocolate, this is 18C-21C maximum.

- What to do if the chocolate has thickened too much?
After some time in the process of working with it, the chocolate begins to quickly thicken, this process is called recrystallization and occurs from the accelerated swelling of cocoa butter crystals. Of course, due to recrystallization, the product does not shine and hardens poorly. In addition, it is very difficult to remove air bubbles from such a school. What to do about it? It's very simple: increase the temperature of the melted chocolate or heat a small amount in the microwave. Heat the chocolate in several stages, not sharply, so that it becomes liquid, as before, without destroying the cocoa butter crystals. It is also important to stir the chocolate constantly, as crystallization mainly occurs on the surface, forming a film.
- Important Note:
The chocolate may continue to cool while you work. This is caused by the rapid increase in the amount of cocoa butter crystals. The solution may be to add a small amount of warmed chocolate or raise the temperature. Or while working with the decor, place the remaining tempered chocolate in the microwave oven you worked with before (not turning it on!). It's warm there and your chocolate will cool slower.

Yes, there are many, many important nuances. They need to be known, respected and remembered!
- Fillings:
The temperature of the filling should be very close to the temperature of the chocolate (where possible). If the difference between the temperature of the filling and the temperature of the chocolate is too great, this will lead to disturbances in the crystallization of the cocoa butter and the final product will be dull and unstable to temperature. The best result is achieved when the temperature of the filling is approximately 5°C lower than the temperature of the chocolate.

- Mold temperature:
It should be as close as possible to the room temperature (+20°C). It is recommended to slightly warm up the molds (for example, with a hairdryer). Make sure that the temperature of the mold does not exceed the working temperature of the tempered chocolate. These precautions will help you get amazing results!
- How to cool chocolate:
The ideal temperature for cooling chocolate when working with molds is 10 to 12°C. Coating chocolate hardens best at 15 to 18°C. Temperature changes of more than 10°C are critical. It is impossible for a fan to purposefully blow on them - this is not right. The temperature of the entire air around should be the same. While the chocolate crystallizes in polycarbonate (or silicone) molds, you can place them in the refrigerator before pouring the filling.
How to store finished chocolate:
Like raw chocolate, finished products are sensitive to temperature, unpleasant aromas and tastes, light and air, humidity and storage time. Here are the most common problems that can occur during storage:
- Fat graying:
This problem is caused by a thin layer of fatty crystals on the surface of the chocolate. The chocolate loses its shine and a soft white layer appears on the surface. This layer makes the chocolate look unpleasant. The cause of fat bloom is recrystallization of the oil and/or movement of filling fats into the chocolate layer. Storage at a constant temperature prevents the appearance of fat bloom.
- Sugar bloom:
Compared to fat bloom, sugar bloom consists of a rough and irregular layer on the surface of the chocolate. Sugar bloom is caused by condensation, such as when chocolate is taken out of the refrigerator and moisture condenses on the surface. The condensation dissolves the sugar in the chocolate. Then, when the water evaporates, the sugar remains on the surface of the chocolate in the form of large, irregular crystals. This gives the chocolate an unpleasant appearance. Sugar bloom can be prevented by avoiding sudden changes in temperature when moving chocolate from a cold to a warmer place (thus preventing condensation). Chocolate products brought from a cold place should be kept in a warmer room for some time before opening the package. This way condensation can be avoided. It is vital for chocolate to be stored under ideal conditions for as long as possible without developing defects or decay.
Regarding storage time. Its shelf life does not last forever!
- white chocolate: 12 months
- milk chocolate: 18 months
- dark chocolate: 24 months
Variations, methods, techniques:

- Boxed sweets.
First, you should keep your polycarbonate molds clean. This is an expensive material and needs to be taken care of. If treated with care, it will serve you faithfully for a long time. A few rules: never put it in the dishwasher; To wash, use a soft sponge, warm water and a minimal amount of detergent, preferably without it at all; after the mold has dried, you need to thoroughly wipe the mold with a cotton swab with alcohol (vodka will not work, it leaves a thin film when it evaporates, you need alcohol). Thanks to these simple nuances, your candies will always be shiny and easily come out of the mold. If you wish, you can use a brush to apply a design with cocoa butter and dye to add brightness to your candies.

Actions:
- Pour the tempered chocolate into the cells of the polycarbonate mold. Yes, you can work with silicone, but since these molds are very flexible, it can get a little messy.
- Tap the sides of the pan with a spatula to release any air bubbles.
- Turn the mold over so that all the chocolate drips out as much as possible. Knock on the walls, but never on the bottom!
- When the drops stopped flowing, we removed all the excess with a large spatula and placed the inverted form upside down on paper or film.
- We waited for the crystallization process.

Then fill it with filling, cover the bottom with tempered chocolate and wait for complete crystallization.

If you did everything correctly, your candies will come out of the mold very easily and will delight you with a bright shine!

Exactly the same steps for any filling of boxed sweets - liquid, ganache, alcoholic, caramel, marmalade.

- Dousing candies.
This is when you make candies with ganache, marshmallow, nougat, marmalade. Something that hardens outside the body is cut into pieces and then dipped into tempered chocolate using special forks for working with chocolate. IMPORTANT: your chocolate for coating should have a high fluidity: 4-5 drops. You look at this parameter on professional chocolate packs; they must be indicated. What does this mean: if your chocolate has low fluidity, then when you melt it, it will still remain thick. If the fluidity is high - such chocolate is liquid, it will drain or flow out of the molds as much as possible, which will allow you to achieve thin walls or shells of your candy. Chocolate with fewer “droplets” is perfect for ganaches and mousses.

- Feather decor.
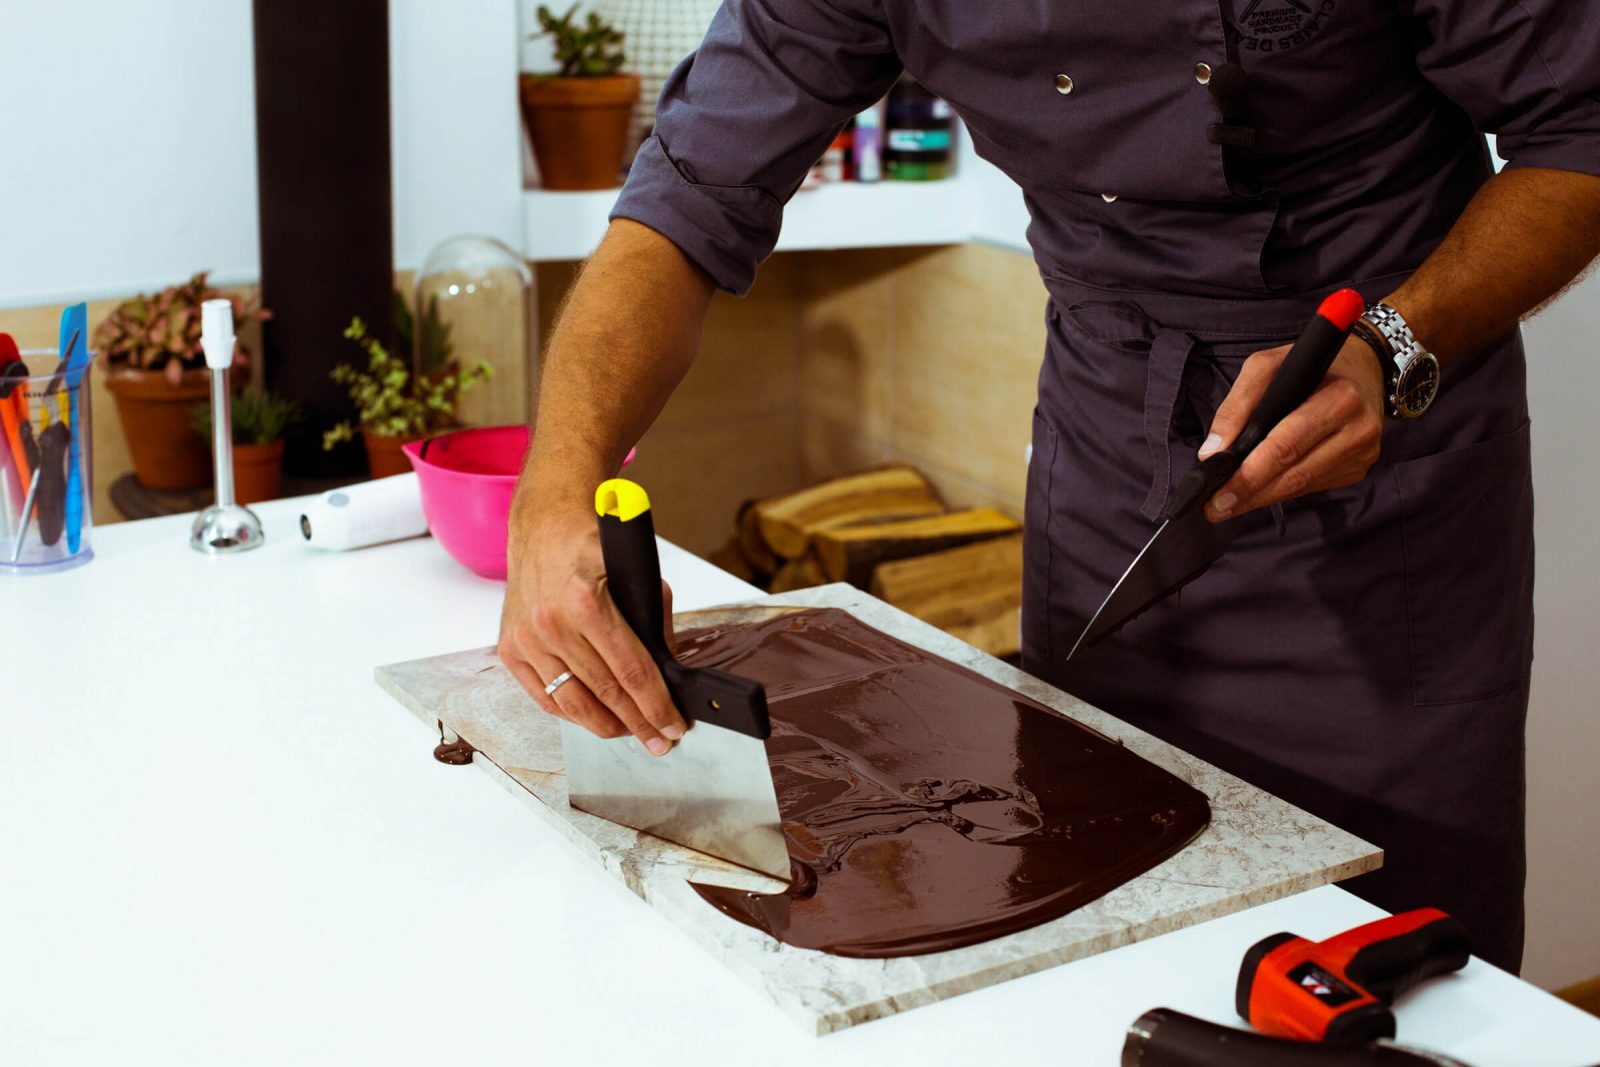
Everything is simple here too - you need a nice, sharp little knife. You dip it flat into the tempered chocolate, turn it over so you can scrape off any excess chocolate on the edge of the bowl. Place it flat on the film for working with chocolate, carefully lift the knife and bring it towards you. You are left with a groove, like a feather. You make cuts on them with a hot scalpel or knife after crystallization.

- You can also work with silicone chocolate molds. Only you won’t be able to “knock.” Therefore, in this case it is more convenient to apply chocolate with a brush.

These “cocoa beans” came from just a silicone mold. After cooling, they were covered with cocoa butter from the compressor.
And here are these hearts made of polycarbonate molds:

Finally, I want to give you a table that will greatly help you understand possible errors and quickly find a solution.
| Problem | Cause | Solution |
| Difficulty removing from mold | Poorly tempered chocolate Mold cooling temperature is high The chocolate layer is too thin |
See "tempering" See "cooling" Use medium flow chocolate |
| White or gray coating on chocolate | Cooling too slow "Super-crystalized" chocolate |
See "cooling" See "tempering" See "tempering" |
| Cracks in molded chocolate | The refrigerator is too cold The layer is too thin and cooled quickly |
See "cooling" |
| Matte surface on molded chocolate | "Super-crystalized" chocolate The refrigerator is too cold The mold is too cold The shape is not too clean |
See "temperature of chocolate" See "temperature in the refrigerator" See "form temperature" See "clearing forms" |
| Thickening of the mass during operation | Excessive crystallization of chocolate | Add temperature Add warmer chocolate little by little. Don't add cocoa butter. |
| The surface is not shiny | Filling too cold The room or refrigerator is very cold Chocolate at the wrong temperature |
See "form temperature" See “workshop temperature” See "tempering" |
| Fingerprints on chocolate | Product touched by wet or hot fingers | Do not touch the surface with wet or warm fingers. If necessary, use gloves |
| Dirty forms | Fingerprints inside the form Molds are stained with filling Dirt in shape Poorly tempered chocolate Cold forms |
How to clean molds: With warm water and very mild detergent. Use a very soft cloth. Sponges or brushes may scratch the molds. Wash with warm water and wipe off the water from the inside. Then wipe with alcohol using a cotton swab. See "tempering" See "form temperature" |
I promised to share some pleasant and useful things about chocolate with you and myself.
Chocolate remains the most amazing edible ingredient on the planet. Due to changes in its temperatures, amazing metamorphoses occur to it. These metamorphoses, namely the transformation of chocolate from a melted mass into crispy decorations, shiny candies, a reliable Santa Claus and an Easter bunny flying freely from a polycarbonate form, are a great tool that is not difficult and is definitely worth learning how to work with.

In many cases, the lack of a thermometer becomes an obstacle for us on the way to working with chocolate. Chocolate requires precise temperatures from us in order to obtain a product that is shiny, crispy and easy to remove from the mold. At the same time, at a time when there were no thermometers, chocolate makers were already making chocolate bars. How did they do it without a thermometer? Can we do the same as them? It turns out it's not difficult at all.
Let's get started right now.
The classic chocolate tempering scheme, which is indicated by the manufacturer on the boxes, is reliably correct. We heat it to 50 C, cool it to 28 C, heat it up again to 31 C. In workshops where they produce a lot of sweets or use a lot of chocolate, it is poured into special machines that automatically temper the chocolate. They just need to set the temperature. The machine has a magic tap from which chocolate, ready to quickly harden, continuously flows.

At the same time, the amazing product chocolate gives us the opportunity to work with it in several ways at once and without a thermometer. All of them are practical, convenient and accessible to you both at home and in small-scale production.
1. Tempering the chocolate in the bowl of the food processor.
This method is often used at competitions, when every second counts. Its convenience is obvious - we use and dirty a minimum of dishes.
Process
Before starting work, be sure to apply red lipstick to your lips. Chocolate loves to be surrounded by beauty. Then put two-thirds of the chocolate in coins or in any solid state into the bowl of the food processor and crush it finely. Then gradually add chocolate heated to 50 C - exactly one third.

Coins - the chocolate is already tempered - this means that it is hard, does not leave marks on your hands, and if you break a coin, you will hear a click-crunch. Chocolate coins quickly melt and spread their stable crystal lattice over the entire amount of melted chocolate up to 50 C, the molecules of which are unstable. Detailed coins also quickly take over the temperature, reducing the overall temperature to exactly 31-32 C. It is at this temperature that the chocolate is in working order. The chocolate has melted and become homogeneous - time to do the test. Dip the tip of the knife into the chocolate.

Within a few minutes the chocolate will show you that it is quickly becoming dull. This means that you can start working with it.
The nature of chocolate is such that the faster the process of cooling the temperature of the chocolate occurs using mechanical movement, in this case the knife is spinning, the better the final result is - shine, crunch, absence of white streaks on the surface. This means that if we melt the chocolate to 50 C, then leave it to cool on its own for an hour to 31 C, nothing will happen. At the same time, if in a room with a temperature no higher than 22 C, we can turn 50 C into 31 C using movement in 5 minutes - the chocolate is then tempered.
2. Tempering chocolate using the one-third plus two-thirds method
The same option as with the combine, only this time we do everything manually.
Process
The coins, one third of the total weight, are added to the bowl of melted chocolate. They transfer, as in the method with a food processor, their stable molecular lattice to the total mass of melted chocolate. The cooling process occurs quickly, movement is involved and therefore the chocolate crystallizes.

The difficulty you may encounter with this method is that the chocolate does not completely melt. If this happens, take an immersion blender and beat the chocolate until completely dissolved.

Time to take the test.
When choosing a method for tempering chocolate, take into account the resulting viscosity or viscosity. This term determines how pourable the tempered chocolate will be, since the method you used to temper it affects its flow or viscosity. Chocolate that has been tempered by adding one third to a container with two thirds will be thicker, more viscous than the result obtained from tempering on a marble surface. This two-thirds method is not the best for pouring polycarbonate candy molds. It will be difficult to get a thin layer of chocolate and air bubbles will be difficult to escape from the surface of the polycarbonate. At the same time, it is perfect for creating sculptures and decor.
3. Tempering chocolate on a cold surface.
The cold surface of marble is most often used. This stone is excellent for food use. A marble board can be ordered from a marble workshop. In addition to working with chocolate, this beautiful thing will also be useful for rolling out shortbread, puff pastry and puff pastry on the inside out.
Process
Heat black chocolate to 50 C (white and milk chocolate to 45 C). Pour a third of the volume of tempered chocolate onto the marble surface. Using a spatula, cool the chocolate until it turns from a completely liquid consistency to a liquid consistency, but is ready to thicken the next moment. The photo shows this consistency. The chocolate stretches like a ribbon and does not flow like water.

Try putting a drop of chocolate under your lower lip - the most temperature-sensitive place on our body. You will feel that the chocolate is already cold, but has not yet thickened. Time to return it to the container with the rest of the chocolate. That is, we return chocolate with a temperature of about 28 C to chocolate with a temperature of about 50 C, which quickly reduces the overall temperature.
If we don’t have a thermometer, how can we understand that the chocolate has reached its operating temperature - 31 C? If the room temperature is not higher than 22 C, you will see that a thin layer of chocolate on a spatula hardens very quickly, turning from shiny to matte. Or do a test - drop chocolate on the surface, after 3-4 minutes it should become matte.

At the same time, if the chocolate becomes thick, it is not convenient to work with, it is difficult to pour, and hardens too quickly. This means that his temperature is less than 31 C and it continues to decrease rapidly. In this case, lightly heat the surface with a hairdryer and stir it until it becomes a fluid consistency. Be careful not to overheat.

One of the reasons for the graying of the chocolate surface on the finished product is working with it at a temperature below 31 C, that is, when it is already visually thick, but it still seems that you can pour it into a mold if you really want to.
When you work with chocolate, you always have a hairdryer at hand to maintain the working temperature of the chocolate at 31 C.
Chocolate that has been tempered on marble will have high fluidity and this method is well suited for filling polycarbonate molds and will provide your future candy or figurine with thin walls.

A few more tips about chocolate:
- It is cocoa butter that crystallizes in chocolate. Manufacturers of average quality chocolate tend to replace this expensive product with cheaper analogues. White chocolate is especially susceptible to this. In particular, Spanish and Italian chocolates will be difficult to temper; they usually do not contain enough cocoa butter. French, Swiss and Belgian chocolates are known for their high quality and therefore are perfectly tempered.
- Chocolate can be colored with fat-soluble food coloring and tempered with color. The paint affects the fluidity of the chocolate, it becomes more viscous. At the same time, it continues to temper well.
- Moisture also affects the flow of chocolate. Keep chocolate away from any form of moisture. If it gets in, the chocolate will become viscous.
- If the chocolate is overheated, you will be able to see bits of coagulated particles in it. One day it’s worth overheating the chocolate to feel and see this phenomenon with your own eyes.
- The viscosity or viscosity of the chocolate is indicated on the boxes if you are purchasing chocolate for professional use. 2 drops means low fluidity. This means that the chocolate will be viscous and tight. For example, this is orange chocolate Cacao Barry. It needs to be melted at very low temperatures; such chocolate curls easily even if you overheat it slightly. This type of chocolate is used mainly for decorations, where fluidity is less important.

- 4 drops on the contrary means that the chocolate will be very fluid. Perfect for filling molds. At the same time, make sure that the layer is not too thin; if so, fill it a second time.
- Chocolate can be tempered many times.
P.S. Many thanks to the photographer - wonderful photos by
What is tempering
Tempering chocolate is otherwise called crystallization. This is the process of heating chocolate to the melting point, then cooling and reheating according to certain rules. As a result of such manipulations, the cocoa butter hardens into a certain crystalline form, which gives it a chocolate texture and glossy shine.
Tempering is necessary for:
- Increasing the melting point to prevent it from melting at room temperature and when in contact with your fingers (melted chocolate loses not only its structure, but also its melting point; this is why my chocolate did not hold its structure and did not freeze in the freezer).
- Possibility to prepare small figurines or chocolate products and unhindered removal from molds after hardening.
- Preventing the occurrence of a greasy coating on the surface (meaning the “greying” of chocolate, i.e. the appearance of white stripes or spots).
- Rapid cooling of the sweet mass (properly tempered chocolate hardens very quickly - within 5 minutes).
- Giving tiles and products shine and a clear shape. In addition to these indicators, real chocolate can be identified by its solid texture and the absence of crumbling when broken. The last manipulation should be accompanied by a characteristic ringing sound.
Tempering rules
So, we found out why you need to temper chocolate. There are three main stages in the process: the melting point, the formation of beta crystals, and bringing the chocolate to operating temperature and condition.

Tempering: chocolate in discs.
Moreover, observing the temperature regime is very important and for each type of chocolate the values are different:
- The white chocolate bar is melted at 40-45°C, cooled to 25-26°C, and then brought to 29-30°C and worked with the mass.
- Dark chocolate is melted at 45-50°C, cooled to 27°C, and then heated to 31-32°C, after which the mass becomes suitable for use.
- Pieces of milk chocolate are melted at 40-45°C, cooled to 25-26°C, and then brought to 29-30°C and molding begins.
How to check the quality of tempering
As I said above, properly tempered chocolate will harden within 3-5 minutes. at room temperature 18-20°C. To check the quality of the process, you should carry out some manipulations:
- If you don't have a special chocolate temperer, checking the temperature of the mass during the cooling stage is easy. Place a drop of chocolate in the center of the hollow just below your lip. If it is hot, continue cooling; if the drop is like a lip or a little colder, great, you can perform the next step.
- Having started the third step of the process, i.e. reaching operating temperature, apply a drop of the mixture to a parchment strip, drop it on the table and observe. If the chocolate begins to set (harden) immediately, you have done everything correctly. You can speed up the process by placing a drop on paper in the refrigerator - hardening should occur in 1-2 minutes. If this does not happen, the mass remains soft, you have failed in tempering and will have to do everything again.
- If the chocolate has lost its fluidity, i.e. has become very thick and you don’t have time to make tiles or figures out of it, heat the mass a little or add a little hot chocolate and stir well.
No nuances
During tempering, you should also adhere to the following points:
- The temperature in the room where the process is carried out is very important. Ideally it should be 17°C, well, maximum 22°C.
- It is advisable to purchase a chocolate thermometer. It will allow you to quickly measure the temperature of the mass. As a rule, confectioners use a laser thermometer, which in 1-2 seconds. measures temperature from a distance.
- Ideally, you should have special equipment for work: tempering containers, a temperature meter, a machine or a bath for tempering chocolate. But it costs a lot of money, and only chocolatiers can afford such a luxury, as well as a marble or granite cooling board. For home or isolated cases, you will have to use a water bath or microwave. But for cooling, you can freeze enough ice in advance (you can break it into crumbs, freeze it again, and then add salt, which greatly lowers the temperature of the ice).
- If you are working on marble, a special spatula called a spatula will come in handy.
- For quick cooling, you can raise the chocolate mass high above a container or marble board while stirring and pour it in a thin stream.
Professional tempering
I propose to consider several professional ways of tempering chocolate.
In car
The easiest way is to use a special tempering machine. You should only load a certain amount of chocolate. The device itself will slowly heat the mass, wait until it is completely melted, cool and then heat the mass again. All you have to do is wait and work with the ready-made treat.

The process is often carried out in a “Wheel” type machine:
- Chocolate is loaded into the compartment in discs (they are called callets), the thermostat is set to a certain temperature, depending on what kind of chocolate you are melting (45°C for dark chocolate) and wait until the callets are completely melted.
- Afterwards, it is cooled to 29 °C and at the same time disk chocolate is added in an amount of 15-20% of the mass previously put into operation. In this case, the temperature of the callets should be room temperature, i.e. about 20°C.
- The tempering machine will automatically mix the melted and solid chocolate. If the discs melt very quickly, it means the chocolate was very hot and you should add another portion of discs and mix again.
- When the chocolate is completely dissolved, the temperature of the mass is brought to working temperature and molding begins.
Stabilization with callets
The principle of operation is the same as in a “Wheel” type chocolate tempering machine, only everything is done manually:
- The chocolate is crushed and or in the microwave.
- Now callets are added in an amount of 5-10% of the previously taken chocolate.
- You need to add them in portions, waiting until they are completely dissolved. Since the callets are already tempered, they start the crystallization process.
- Cool the chocolate this way to working temperature.
- Stir the mixture well and check for quality.
The good thing about this method is that it simultaneously cools the chocolate and crystallizes it.
Tempering in blocks
The method is similar to the previous one, only instead of callets they use a large piece of tempered chocolate, which is kept in the mass until it reaches the desired operating temperature. After which the unmelted part of the block is pulled out. The method is very fast.
Tempering on a marble table or slab

The method is considered quite fast and takes no more than 10 minutes:
- The chocolate is broken or cut into small pieces using a serrated knife and placed in a water bath (or microwave) to melt. It is important not to overheat chocolate, especially white and milk chocolate, as it can become grainy, making it difficult to work with in the future. Please note that when melting, you should protect the chocolate from steam or droplets of water, otherwise the mass will deteriorate.
- Remove the container with the thick mixture and check that all the pieces have melted. If not, stir until it becomes homogeneous.
- Pour 2/3 of the entire mass onto the chocolate tempering stone and, armed with a scraper and spatula, “knead” the chocolate on the board, toss it, distribute it on the table for better and faster cooling.
- The rest of the mass should be hot, so you can even cover it a little with a towel.
- When the chocolate begins to thicken, indicating the appearance of crystals, check its temperature under your lip or a thermometer. If the temperature is sufficient (see the tempering temperature guide), immediately add the remaining hot chocolate to the container and check the temperature again. It should correspond to the third step. If the mass is colder, it should be slightly warmed up to the desired value. At the same time, do not overheat the mass, as this will affect further molding (it will not harden or a whitish coating will appear).
Tempering chocolate at home
There is no way to keep a marble board or a tempering machine at home, so you will have to use improvised means. I offer several methods for home tempering.
Storing the finished dessert
Any product has an expiration date. And chocolate is no exception. To preserve its taste, you should follow the rules for storing it:
- Do not store together with fish, cheese, meat, or strong-smelling foods, as the delicacy strongly attracts odors.
- Store in a place inaccessible to sunlight.
- The chocolate storage temperature is 12-20°C, humidity no more than 70%.
- Avoid contact with insects, as the sweet smell strongly attracts them, and after a while you will see their new home instead of chocolate.
- Try not to keep treats for longer than the allotted time.
As for expiration dates, each type of chocolate has its own limits:
- dairy is stored for 18 months;
- white – 1 year;
- dark no more than two years.
I hope you took into account all my advice. You can clearly see the whole process by watching the video. With proper tempering, you can prepare not only amazingly tasty and shiny chocolate bars, but also make all kinds of figures and even chocolate sculptures from it that will decorate a cake or your sweet table.
Every home confectioner has encountered the problem of unhardened chocolate glaze. No matter how long the cake sits in the refrigerator, the surface remains liquid, which leads to a spoiled product and cold, unpleasant-tasting baked goods. This happens due to the fact that not everyone knows the term tempering chocolate.

This is not a very complicated process that can help even an inexperienced cook in preparing a cocoa product that will hold its shape and be easy to change. The fluidity of the melted chocolate determines what kind of dessert you make and in what form the bar crystallizes.
Tempering in cooking
Tempering is the process of controlling the temperature of a product. It is most often used in making desserts or sweet decorations for baked goods. The process is simple, but often raises questions among ordinary people who are not familiar with confectionery terminology.
Also called recrystallization, tempering produces solid chocolate that will set quickly without producing an unpleasant white residue. On the contrary, the surface of your product will have excellent texture and color. To make the tempering process smooth and easy, follow our simple instructions. The result will exceed all expectations!
What is tempering
Those who have not been involved in the art of confectionery before may not know what tempering is. In simple terms, tempering is controlling the temperature of chocolate. It only requires two steps: heat and cool the chocolate, then heat it again.
In confectionery, tempering is used not only for making glaze, but also in decoration for creating chocolate figures. It is worth remembering that each type of chocolate has a different temperature regime, which must be especially observed when cooling and reheating:

- bitter chocolate (and dark): heat to 49-55°C, cool to 28°C, heat again to 31-32°C;
- milk chocolate: heat to 46-50°C, cool to 27°C, heat again to 29-30°C;
- white chocolate: heat to 43-45°C, cool to 26°C, heat to 28-29°C.
After three stages, heating the chocolate should not be repeated, otherwise everything will have to be done again. After cooling, you only need to maintain the specified temperature. It's not difficult, but it will allow you to create wonderful creations from a delicious delicacy.
Reasons for recrystallizing chocolate
When wondering why temper if chocolate will melt at room temperature anyway, remember that this process is very important. This step may seem like a waste of time. Yes, the decision is yours, but if you need a presentable appearance of the product, a solid structure that will allow you to create masterpieces from cocoa tiles, then in no case should you neglect this stage.
Temper the chocolate to stabilize its shape. Thanks to three stages (heating-cooling-warming), chocolate returns to its former hardness and easily hardens when baked. At the end of the procedure, the chocolate must be brought to a certain temperature, depending on the type. For example, dark dark chocolate must be brought to 31-32°C.
Why temper chocolate?

This process is an important part of the work of professional confectioners and culinary specialists. Thanks to recrystallization, the external characteristics of frozen chocolate are improved.
The main reason why it is worth tempering chocolate is the speed at which it hardens after undergoing the recrystallization procedure.
The appearance of your product will be strikingly different from the appearance of a similar product made without the use of tempering. There will be a sugar coating, the chocolate will be gray and may not set. Tempering the chocolate is not necessary, but it will definitely make your dessert even better.
Tempering process
What do you need to temper chocolate? It is worth noting that the correct process cannot be carried out using only improvised means. To carry out the confectionery procedure, you need special equipment, which not every kitchen has.
However, some of the tempering recipes do not require complex ingredients. They are suitable for those who are going to recrystallize sweet cocoa bars at home. Those who are seriously involved in confectionery will not care even about complex tempering methods - they probably have all the necessary items.
For this you will need:
- cooking thermometer;
- spatula (preferably silicone);
- marble surface;
- saucepan with water;
- bowl (we recommend metal);
- a bowl of cold water or ice (for the “cooling” stage).
And separately from the entire list, chocolate should be noted for successful tempering. After all, the main ingredient here is only chocolate. Not every cocoa product is suitable for this process. Any type of chocolate melts at a different melting point and this is worth remembering.
Now let's talk about which chocolate does not need to be tempered. Any cheap option cannot guarantee successful tempering, because usually it is just a tile, where there is simply no cocoa, which is the basis of all glaze production. Time and money are the very components on which you should not save.
After all of the above, the question arises: “How to properly temper chocolate if you don’t have the necessary equipment at home?” It’s very simple, because there are a lot of ways. Not everyone requires special equipment. We talk about them below.
Video review of methods for tempering chocolate
Methods for tempering chocolate
Don't be intimidated when you see the list of required items. There are more than one option for properly tempering chocolate. You will find several ways below. Preparing a dish now is not a problem; you just need to find a recipe on the Internet. The same goes for tempering – just knowing the correct recipe is enough. Despite the fact that there are a lot of methods, we recommend trying several and choosing the one that suits you. Some methods are suitable for more advanced cooks, while others will be suitable for those who have just begun their journey into the world of confectionery art.
Tempering chocolate on a table or marble board
Tempering chocolate, it must be admitted, is not an easy process in confectionery, so this classic method using a marble board greatly discourages the home sweet lover when choosing a tempering method.
On the one hand, yes - not every home has marble, but on the other hand, this beautiful material is not needed for specific rituals, just for cooling the cocoa product.
So, first, melt the chocolate. Before this, grind it and place it in a water bath. Watch the temperature at which the chocolate begins to melt. Stir continuously until it reaches the desired temperature.
Then start cooling: remove from the water bath without stopping stirring. Pour two thirds of the mixture onto a cold marble board.
Important point! Use a pastry spatula to spread the chocolate over the marble and reassemble it using a scraper. Perform these movements for about two minutes. This is necessary so that two thirds on the board are cooled until crystallization, and one third, hot, is heated to operating temperature.
Keep an eye on the chocolate - as soon as two-thirds on the board begins to thicken, place the mixture into 1/3 of the chocolate, stir, checking the temperature. If everything is good, that is, it is close to the desired level, then continue stirring until it is perfect.
If you are unlucky and the temperature is much higher, then repeat the procedure on the marble surface and repeat the mixing again. The result should look like this: smooth, uniform chocolate. If so, then proceed to reheating.
Before reheating, take the time to check the quality of previous processes. To do this, dip a small piece of baking paper into the chocolate. At normal temperatures it will stabilize in 3-5 minutes. If the chocolate does not pass the test, then you will have to return to the previous stages.
If everything went as expected, then heat the chocolate to the desired temperature, but most importantly, do not try to overheat it! A couple of extra degrees and that’s it – you can forget about the smoothness and gloss of the finished chocolate. It is possible to correct this error, but it is very difficult. To do this, the whole process will have to be repeated from the very beginning.
The flow of chocolate is important. If the chocolate thickens too much, add cocoa butter.
Tempering chocolate in blocks

Now let's talk about how to temper chocolate pieces. This method is not for large quantities of chocolate. This method is usually chosen for white chocolate, because it is usually used in smaller quantities and must be tempered with special care.
Use the chocolate in pieces using the callet tempering method, which will be mentioned below. Only in this method, the unmelted part of the piece is removed in the first step and proceed to steps 2-3. By the way, tempering is faster this way.
How to temper chocolate
The process of precrystallization of the product in pieces, most often white cocoa bars, occurs with the help of callets. Callets are ready-made pieces that have undergone a tempering process. They are sold in specialized stores and greatly simplify the procedure for those who are doing this difficult task for the first time. In this case, the product can be melted either in a water bath or in a microwave oven, which also adds simplicity and ease to preparing your first desserts.
Microwave Tempering
Tempering chocolate in the microwave is the most simplified option of all. Making microwave chocolate in the microwave is very simple. The tile is grated using a grater and placed in a glass or plastic container. After this, put the chocolate in the microwave. At a power of 800-1000 W, melt to a certain type of mass (almost melted, with slightly visible whole chips), but check the chocolate product every 15 seconds, and more often if possible, to avoid overheating.

When the contents reach the desired consistency, remove the bowl from the microwave. Stir the mixture until it reaches a homogeneous consistency, add cold chocolate, bring to the required temperature.
Crystallization using callets
This method has already been discussed above. Let us remind you that callets are pieces of cocoa bars that have already undergone tempering procedures and are ready for use. Adding them to the mass speeds up the process and simplifies it. Callets can be bought at a candy store or ordered online. There is a large assortment, so choose those that suit you in terms of chocolate color and price.
Crystallization is the process of heating and cooling a mass to certain temperatures. Thanks to this, the cocoa butter hardens into a crystalline structure that retains its glossy shine and hardness over time, allowing it to be manipulated, shaped, and used as a glaze for your baked goods.
There are only five stages of crystallization, so the cooking process will not take long:
- chop the chocolate and melt in a water bath or in the microwave;
- now add callets in a proportion of 5-10% of the previously taken chocolate;
- you need to add them in portions because you need to wait until the previous batch melts;
- cool the chocolate to operating temperature;
- Mix the mixture well and do a quality test.

After hardening, a glossy shine and clear shape are ensured when the crystals are successfully connected. To test the quality, you can spread a small amount of the finished product over the foil and wait for it to harden, which should occur after a few minutes. The resulting product should be thin, crispy, and easy to break.
How to temper chocolate at home
Tempering delicacies at home is possible, although it is slightly different from the process of preparing the mass in a professional kitchen. The main difference is the availability of one or another equipment, often necessary for working with capricious materials. That is why home confectioners who make delicious treats only for their loved ones try to avoid this complex procedure and use ganache or glaze, the preparation of which does not take so much effort and time.
However, it should be remembered that the glaze made from tempered cocoa bars is incredibly tasty and beautiful. The joy and smiles on the faces of those who try your product will be an excellent reward for the efforts and time spent.
Cooking at home
After analyzing the most popular tempering methods, the question arises: what is the best way to temper chocolate at home? The most popular of them is a water bath. The method is simple, well known to those who have already prepared icing and ganache or baked desserts with cream. This method has simple instructions that are easy and pleasant to follow.

Temper in a water bath as follows:
- Crush the tiles, place the pieces in a bowl and place in a water bath.
- The contents of the bowl will slowly melt, and as soon as the mass acquires a liquid consistency, turn off the heat.
- Remove the bowl from the water bath and wrap it in a towel to keep it warm.
- Add a piece of cold, solid, already tempered chocolate to the mixture to quickly cool (to start the crystallization process). Stir until the mixture reaches a homogeneous consistency and cools to the desired temperature.
Tempering chocolate at home is a nerve-wracking exercise, because the cooking process is very capricious. If for some reason tempered chocolate begins to melt in your hands, then the reason most likely lies in the fact that the operating temperature was exceeded during heating. Due to overheating, the crystallization process was not started. Failure is also possible due to the fact that the room temperature was exceeded during operation.
You can fix everything by just starting the process again or using a new piece of treat. Don't be afraid to make mistakes; this can often lead to overexertion, which can affect how closely you follow the recipe.
If everything went as it should, then such chocolate will make, for example, delicious candies. To do this you need to do everything correctly, as indicated in the recipe.
Rules for storing finished chocolate

Each edible product, like people, is not immortal, therefore it is worth knowing about the rules for storing tempered chocolate, because this will help you make the most of the available amount of cocoa bar. To preserve its beneficial properties and taste, you should remember the storage norms:
- When chocolate lies next to cheese, fish or meat products and anything that smells strongly, this is definitely not good for it, since this chocolate product likes to pull other people's aromas onto itself. You definitely don't want to try a treat that smells like smoked fish or blue cheese.
- The product should be stored in a dark place, out of reach of sunlight. This is especially true in the summer, when your product can melt if the temperature is exceeded.
- The product is ready to live at temperature conditions of about 12-20°C degrees, humidity no more than 70%. A place with similar characteristics can definitely be found in any home.
- Insects are enemies, do not allow contact with them. The sweet smell and oils in chocolate act as a bait, which can make chocolate a home for a huge family of ants and other insects that you definitely don’t want to find in your treat.
- Try not to store finished treats beyond their expiration dates.
Each type of sweet has its own expiration date. Milk chocolate can be stored for up to 18 months, white chocolate for up to one year, black and bitter chocolate for no more than two years. Introduce daily consumption of this sweet treat into the norm in your family, and not a single cocoa bar will sit on the shelf for more than a week.
We create masterpieces: cake decorations, figurines and chocolates

Tempered chocolate is needed for further, more elaborate work with it. Products made from it come out with a beautiful rich color, harden quickly and will be an excellent addition to any baked goods. You've probably seen videos where confectioners create incredible patterns and figures from thin layers of cocoa mass.
Flat crafting is one of the methods for creating decorations for cakes, pastries and other baked goods. Many of these methods can be repeated at home with minimal equipment.
Method for flat figures and patterns:
- Prepare cling film or parchment paper, otherwise cocoa butter in chocolate and physical work on the product may damage the furniture.
- Pour the tempered chocolate onto the previously prepared surface, spread it with a pastry spatula, the required layer thickness is at least 3 mm. Show off your design skills by adding decorative flowers, sweets, marshmallows to the surface of the chocolate, and cut out the desired shapes of different sizes using metal cutters.
- You can use special stencils into which chocolate is poured immediately, resulting in a finished product without any physical effort.
- Use a piping bag for the design. Choose a nozzle of your choice and use the nozzle to apply the chocolate to your work surface.
- Leave until hardened in a cool, dry place.

The method for three-dimensional figures and patterns differs from the method for flat figures in that there is no need for a working surface. To work with chocolate, use polycarbonate and silicone molds. Forms of the first type should be wiped with a cotton pad, the second with a towel so that they are dry and clean. Apply the mixture onto the mold using a brush.
Remove excess and uneven surfaces with a pastry spatula. Place in the refrigerator until set. Then repeat the previous step, place the molds on a flat surface and leave to cool and harden. As the chocolate hardens, it will shrink slightly in size, which will ensure that it can be easily removed from the mold.
Tempered chocolate will quickly become your go-to for confectionery making, allowing you to experiment more with shapes and designs, add creative decorations to your baked goods, and control the texture of your frosting.
A cake decorated with delicate patterns of chocolate or small cocoa balls made using a silicone mold will become the center of attention of your holiday table. If you want to go even further, start cutting out complex figures, shapes and numbers that will help you wish your loved ones a happy birthday or other holiday.
Bon appetit!
